A Done with That® Project by Koper, America’s #1 Connected ContractorTM, Free Augmented Article©
Easy Tile Fixes….Done with That®
Tile is an extremely durable material. Even so, loose or damaged wall tiles are not an uncommon occurrence. Movement of wall supports, warping of building studs, or shifting of the foundation can cause tiles to crack. The use of wrong materials or incorrect preparation of the wall during the original tile installation can cause tiles to come loose, as can moisture buildup or excessive vibration, like slamming a door or window.
Ceramic tile replacement can be quick and easy, even for someone who has never done the job before. Few masonry skills are required. Although you could probably complete the task with common household tools, a glass cutter, notched trowel and especially hardened drill bit for ceramics will make the job much easier.
Glazed wall tile is the most frequently used type of ceramic tile. It is easy to maintain and is available in a number of colors, shapes, surfaces and sizes. The standard piece of tile is called a field tile. It has four unfinished edges. Other tiles, called trim tiles, have one or two smooth finished edges and are used to turn corners and create special borders.
Tile is rarely made of the same substance as the surface to which it must adhere, therefore special adhesive is needed to bond the two surfaces. Tile installed on walls usually adheres with “mastics.” These organic adhesives are premixed. They require no further addition of powder or liquid and they cure or set by evaporation.
Ceramic tiles set into adhesive are separated by spaces. These spaces are filled with grout. The grout lines are usually of uniform size. Grouting material comes in several colors. Grout and tile color can match or contrast, but grout is more functional than decorative. It prevents water and dirt from getting between and behind the tiles. Most grouts are waterproof, mildew resistant and easy to clean.
One word of caution—do not do your cleanup with steel wool. It can scratch ceramic glaze and if your water has a high mineral content it will eventually cause stains.
Getting Started Step-by Step Tile Removal
- Wear safety glasses while removing broken tile. Remove old grout with an awl. (An ice pick, a screwdriver, or a nail will work too.) Work slowly to avoid damaging the tiles that border the one you want to replace.
- If the tile is badly damaged or was not originally bonded tightly to the wall, pry it away from the wall with the awl. If the tile is firmly bonded to the wall, use a center punch or nail set to dimple the ceramic close to its center as a starting point for drilling through the tile.
- Using an electric drill equipped with a 1/8-inch or 3/8 inch masonry or ceramic drill bit, drill the tile at the center punch hole.
- Score the tile with a glass cutter. Work from the outside edges toward center punch hole, scoring from corner to corner and side edge to edge. Lubricate the glass-cutter wheel with a lightweight oil before each stroke.
- Starting at the center, chip the small pieces away from the wall using a steel chisel and hammer to break and pry them.
- Scrape away old adhesive and grout with a putty V knife until the wall surface is clean and smooth.
Setting the New Tile
- Use a notched trowel or putty knife to “butter” adhesive to the back of the new tile. If you are working with squeeze tube adhesive, apply it to the center back of the tile, then spread it with the putty knife. Press the tile firmly against the wall until it is flush with the old
- Use masking tape to hold the L. tile in position while the adhesive dries. Generally 12 to 24 hours of drying time is required before you can apply grout, but check the directions that come with the adhesive you are using. Remove tape before grouting.
- Spread grout between tiles with a sponge, putty knife, or with your fingers. You will need a firm pressure to thoroughly mold grout into the spaces. Allow the grout to set for 15 minutes, then compact it with a rounded object such as the end of a toothbrush. 4. Using a damp sponge, wipe away the excess grout. Seal joint with a bead of flexible silicone caulk where tiles meet another surface at an angle.
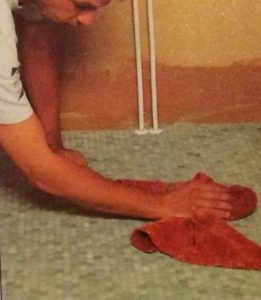
- Once the grout has dried (at least 24 hours), clean the new tile and the surrounding area with soap and water; polish with a clean, dry cloth.
America’s #1 Connected ContractorTM, Free Augmented Article©
If your in Lake Orion, Clarkston, Oxford Oakland County, Michigan and would like a free quote please contact us at 248-701-9328, for the best rates in Clarkston, Lake Orion and Oxford.
Perhaps you desire the best tile and grout repair rates in Oakland County, Michigan call 248-701-9328 for a free quote.
